
Tuesday, October 23, 2012
Best Peanut Butter Cookies Ever: 4/5
I had a massive craving for peanut butter cookies. I considered using *gasp* a mix from the pantry and then remembered seeing a flourless recipe on Pinterest. I was skeptical, but they turned out yummy! I did miss the flour, but not too much. Oh, and there is no added butter or oil (just lots of peanut butter and sugar!). The texture was pretty close to my favorite recipe, but not quite. I think the fat and flour make it less grainy and crumbly. But for a recipe whipped up in 15 minutes from start to tasting time, this will be a keeper.

Tuesday, October 16, 2012
Jewelry Cleaner: 3/5
My wedding ring has some nooks and crannies. I tried to snap a picture, but I'm not skilled enough to figure out how. All of the pictures were just one big flash. When I turned off the flash, you couldn't tell how shiny the final product was. Anyway. Take my word for it. There are many places to harbor grime. I try to get it cleaned by the jeweler once or twice a year. It's free, but I feel like I'm taking advantage. So it only gets cleaned when I'm going to the jewelry store anyway to get my watch repaired.
A diy Jewelry Cleaner sounded fantastic. And it was okay. But not fantastic. After using lots of salt and baking soda as well as dish soap, my ring did come out clean! But not much cleaner than if I'd just scrubbed it with the dish soap. I think next time I would just omit the other ingredients (and lose the foil).
A diy Jewelry Cleaner sounded fantastic. And it was okay. But not fantastic. After using lots of salt and baking soda as well as dish soap, my ring did come out clean! But not much cleaner than if I'd just scrubbed it with the dish soap. I think next time I would just omit the other ingredients (and lose the foil).
Tuesday, October 9, 2012
Homemade Teething Biscuits: 4/5
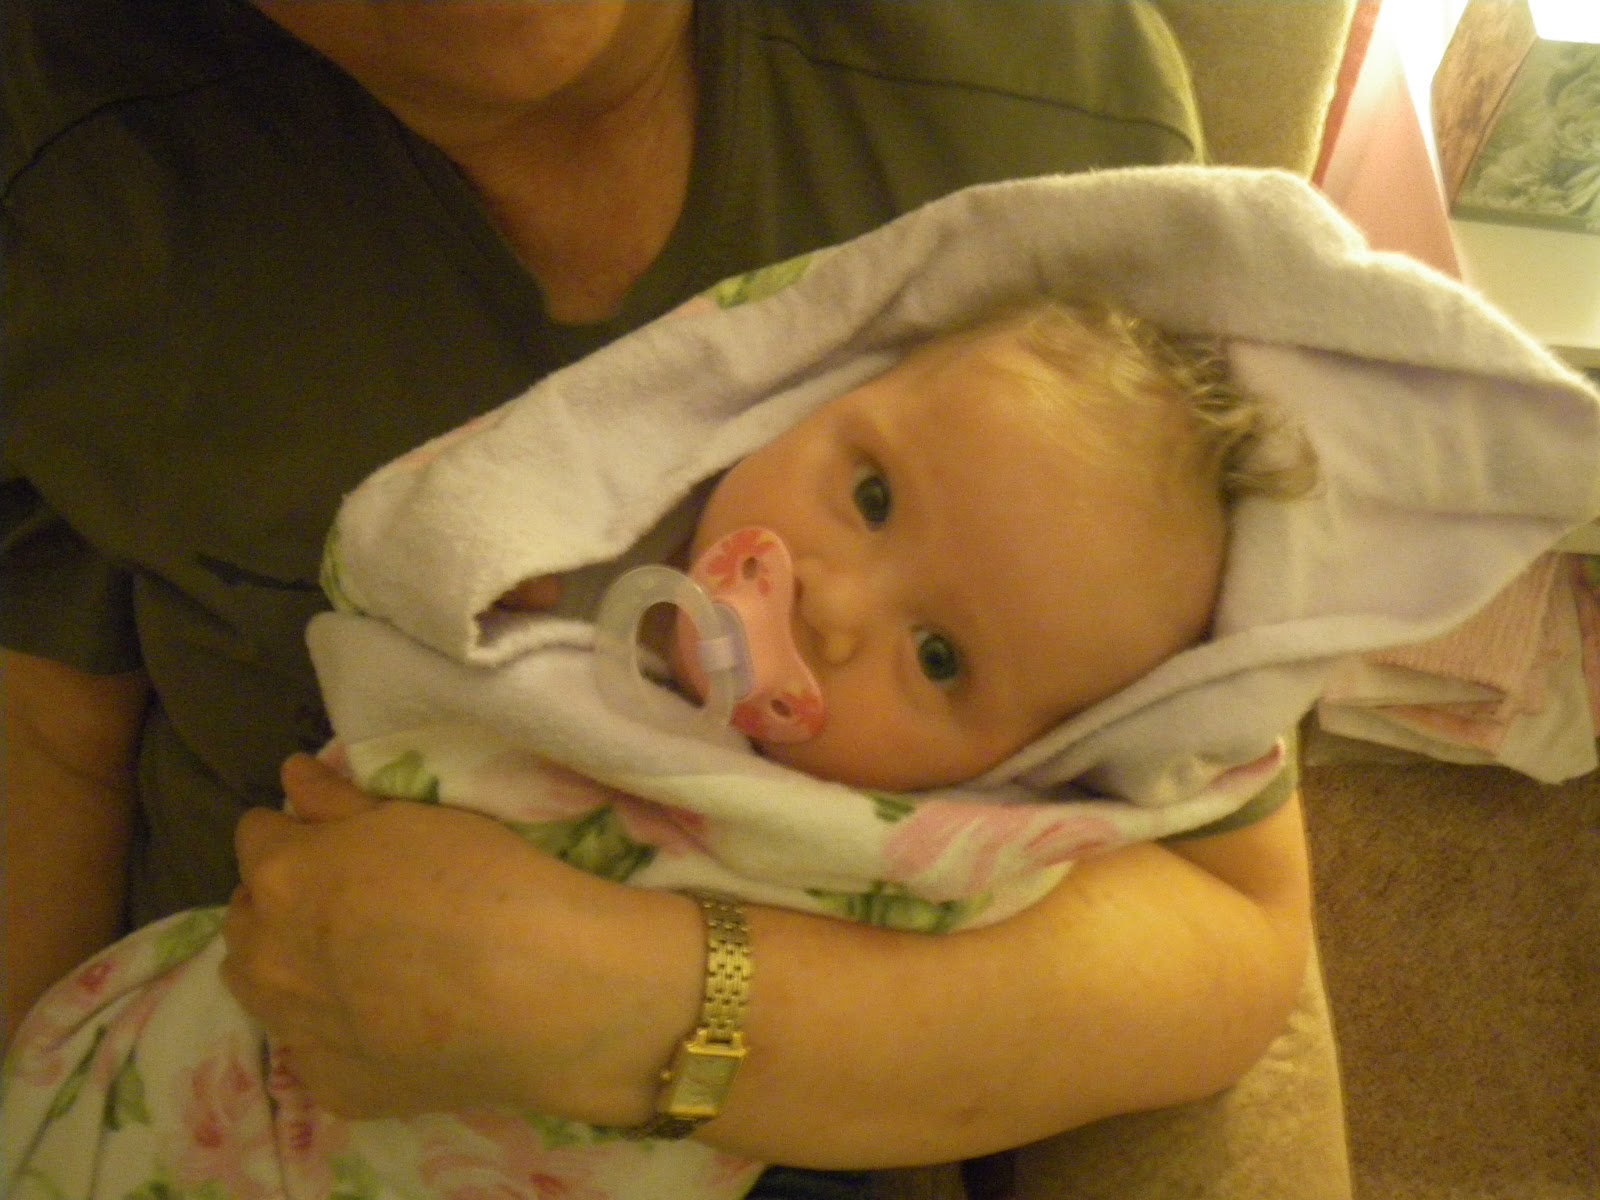
Baby girl has been teething. We waited and waited for a tooth to show itself. We blinked. Then four teeth appeared almost all at once! Naturally, I decided to buy some teething biscuits. We checked several stores but couldn't find any in the baby food aisle.* What?? I know my little one isn't the only teether out there. But then I remembered this pin. I could MAKE my own biscuits.
The recipe was simple to whip up during naptime. I swapped squash for the bananas since we didn't have bananas (what child doesn't like bananas? and prefers veggies to fruits??). I would recommend using something a little sweeter like sweet potatoes though. They taste awful to me! Ha! But the important thing is that this little one loves them. See?

Sorry, the picture is from my old fashioned, not-smart phone. But I think you'll agree the subject is still pretty darn cute.
Two last suggestions: 1.) Be prepared for a mess. Because the biscuit gets soggy, hands get sticky, then everything she touches (which is everything) also becomes sticky. And orange! 2.) I had to bake the biscuits about 20-30 minutes longer than the recipe suggested. I may have left the dough too sticky, but just keep baking until they are dry and crisp. Oh, and remember they will firm slightly as they cool.
*Note: I have since seen some barley biscuits in the organic aisle. When my own run out, maybe I'll give them a whirl.
Tuesday, October 2, 2012
Best Way to Ripen Peaches: 5/5
You know the old paper bag method of ripening a peach? Well, I never have a paper bag on hand. Almost never. I admit, with shame, that I've tried to ripen peaches inside a greasy fast food bag. Don't be like me. Try my new favorite. It's the Best Way to Ripen Peaches.
This guy knows what he's talking about. I have converted to ripening using a tea towel (or other linen), and I am so happy! It works much better than using a paper bag anyway, and I always have a clean towel to use. Trust me, this is the way to go.
By the way, I'm sorry for the long absence! I having been working on a few projects, recipes, and crafts. I just haven't been blogging about them. I am catching up though, so you should be seeing regular Tuesday posts again. I'm sure you've been devastated without them. Ha, I'm sure you didn't even notice.
Tuesday, September 4, 2012
72 Hour Kits for Babies - Special Post!
I came across a pin about 72 Hour Kits for Babies. Of course! We would need one for the baby too. I have used the Food Storage Made Easy for reference before and was pleased to see they had a section on infant 72 hours kits.
I didn't follow the list exactly but used it as an excellent jumping off point. Here is what I have:

Of course, the kit has changed a little as Angela has grown, and will continue to change. But here are my basics:

I didn't follow the list exactly but used it as an excellent jumping off point. Here is what I have:

Of course, the kit has changed a little as Angela has grown, and will continue to change. But here are my basics:
- Infant acetaminophen (Tylenol)
- Travel-sized shampoo
- Travel-sized lotion
- Travel-sized baby powder
- Travel-sized baby soap
- Desitin
- Two onesies and one pair of little pants
- Socks
- Infant-sized towel (is soft and can double as blanket, if needed)
- Little washcloth
- Bib
- Jersey-knit blankets (2)
- Muslin blanket
- Diapers
- Wipes
- (6) 8 oz. ready-feed formula bottles
- Empty Playtex drop-ins bottle
- Drop-ins for the bottle (I figured this would allow us to get by without washing the bottle over and over)
- Extra nipples for the bottle
- (5) 2nd-stage prepared baby foods
Now. Here's the important part. I do NOT leave home without a well-stocked diaper bag. In a disaster, the diaper bag is coming too! Here is the list of my diaper bag contents:
- Diapers
- Wipes
- Bib
- Blanket (usually muslin)
- Pacifier
- Few toys/books
- Change of clothes (onesie and bottoms)
- Container with powdered food (pumpkin in our case), powdered formula, and rice cereal
- Four little spoons
- Card with pediatrician's info
- Cold storage compartment for already-made bottles
- Extra bottles (already-made)
- Wet storage bag for damp clothes or dirty diapers or whatever you need to seal and store
Keep in mind, this is a list adapted for our family, our baby's needs, and our environment. We live where it is HOT. We are not likely to need more blankets, even in the colder months. Keeping hydrated is going to be much more critical than food, so we need more bottle room than baby food space. Lastly, fitting all of this was a little tricky, so I had to be clever. For example, I rolled up the bib, socks, etc., and stuffed them inside the empty bottle:

Also, rolling blankets and clothes takes up less space than folding. I'd love to hear your tips and ideas for baby 72-hour kits! Please share in the comments!
Tuesday, August 28, 2012
Play Group Granola Bars: 4/5

Tuesday, August 21, 2012
Dark Chocolate Blueberry Muffins: 4/5
Can you tell that I love muffins? I do. So very much. They are easy to whip up, and they are even easier to grab in the morning for breakfast. Or later in the day for a snack. This is another muffin recipe I've had in my to-do stack for awhile. Oh my heavens. These were so good! I'm afraid to say it, but I would leave out the blueberries next time. They made me feel like I was eating something healthier, but they didn't add much taste-wise for me. This recipe does call for dark cocoa powder. This is not your usual cocoa powder! I first learned about it through Joy the Baker's Midnight Black Chocolate Pudding (another winning recipe!). If you are looking for something with extreme chocolate, I highly recommend you find some. Lastly, I am incapable of following a recipe exactly, so I did not use pastry flour. I used a 50/50 mix of all purpose white and wheat flours, as suggested in the comments.


Tuesday, August 14, 2012
Holepunched Cards as Keepsake: 5/5
Do you keep all of the cards you receive from people? I do. When my dad passed away, I realized he kept 100's of cards he'd gotten over the years. I went through them all and kept the ones that were sentimental or especially funny. Even though I bemoaned my dad's slight hoarding instinct while going through the rest of his things, I was glad to have those memories.
The problem is that these cards take up space! And they're a pain to organize. My dad had a box. And it worked. But it wasn't great. I, on the other hand, had a folder or two in our filing cabinet. It didn't work much better except that it gave me reasonable space constraints (so I couldn't save too many, which I saw as a good thing). SimpleMom.net has some wonderful ideas here! I have used the scrapbooking idea for Baby Girl's cards in her keepsake book, and I loved it! Sadly, it took about a billion years (or at least several hours) to cut apart all of her cards and attempt to collage them artistically. I liked the journal idea but don't have a journal that can be taken apart, so the hole punching thing would be out of the question.
Some pinner along the way had an idea to hole-punch the cards and make them into their own "book." No extra writing required! I gathered all of my folders and sorted the cards. I made categories such as, from Mom, condolence cards, from husband, etc. Then I borrowed a friend's fancy hole-puncher and got to it! I am terribly ashamed of my photography, but I was super excited about the book results!

P.S. The card with the orange and yellow birds was made by my talented friend Meredith. You can check out her other lovely work on her website Lily Jane Stationery. I wish she lived closer so she could take my pictures for me!
Tuesday, August 7, 2012
Honey Lemon Olive Oil Muffins: 5/5
Weird, right? Who puts olive oil in a muffin? This recipe intrigued me enough to bookmark even before my days of Pinterest. However, it baffled me enough that I put off making them for two years. I'm so glad that I finally caved and tried them. Delicious! The olive oil was just a faint background note, but that little hint was great paired with the lemon and honey. I admit I was too lazy to make a glaze; I'm sure they would taste even more amazing with it. Also, we had some fading blueberries in the fridge, so some of the muffins were technically Honey Lemon Blueberry Olive Oil Muffins. Both ways were yummy! But I would recommend adding the blueberries into the batter instead of remembering them after all of the muffin batter has been scooped into the pan. Otherwise your muffins will look like alien muffins. Like mine.


Tuesday, July 31, 2012
Baked "Stand Up" Tortilla Shells: 5/5
A few years ago, I stopped buying or frying our chalupa shells. I brush corn tortillas with oil and bake them instead. Much healthier and a little cheaper. Score. Alas, I was still buying taco shells. I mean, how could you replicate that pocket at home--without frying? Enter brilliant idea from EatingWell.com. Hooray! What an awesome concept. Here's how they turned out:

They weren't the prettiest things, and let's be honest, they didn't have quite the same texture as a nice fried tortilla! But for a healthy knock-off, I was exceptionally pleased with them. I don't plan on buying taco shells again anytime soon.

They weren't the prettiest things, and let's be honest, they didn't have quite the same texture as a nice fried tortilla! But for a healthy knock-off, I was exceptionally pleased with them. I don't plan on buying taco shells again anytime soon.
Tuesday, July 24, 2012
Bathtub Stain Removal: 3/5

We had a bath/shower until installed in our guest bathroom. It looks great except we've had these orange streaks in the tub. I have tried so many things to clean it! Bleach, Magic Eraser, vinegar, baking soda, Pine-sol, and Scrubby Bubbles. Nothing even made a dent. I've used paper towels, rags, stiff brushes, and sponges. No difference there either. Finally I found an old message board talking about something similar. I figured I'd tried everything else, why not try Clorox 2? I still had to scrub a bit and apply twice, but it worked!
*Temporarily. It was suggested on the message board not to use a bleach cleaner. I haven't! And yet the stains came back. Once again I had success with the Clorox 2. I'm thinking the marks are due to something besides using a bleach cleaner, but I have no idea what. Not that I enjoy scrubbing the tub but at least I have a recurring solution, even if it isn't a one-time fix.
*NOTE: Problem solved! I think. I forgot that while we had company, some Clorox Wipes were used. Looks like bleach was the problem after all.
Tuesday, July 17, 2012
Cereal Container for Car Trash: 4/5

A cereal container was the solution I didn't know I was looking for. I even found a container that was designed to store cereal while still in the bag; it was easy to just stuff it with a plastic bag. Of course it seals, so I'm less worried about tossing food-related garbage in it. Then when it's full, I'll just toss the bag and put in a new one.
My only complaint is that it does roll around in the car. I don't have a middle console, so the "garbage pail" is underfoot. I'm sure I could weight it down or even velcro it under the dash or something like that. Any suggestions?
Tuesday, July 10, 2012
Baked Southwestern Egg Rolls: 4/5

Just before Angel baby was born, I made egg rolls for the first time. I was scared about the wrapping and the frying. Both went better than expected. I am not a huge fan of deep frying though, so I knew egg rolls were a once-in-awhile-dinner-item. Then I saw this post for baked Southwest egg rolls! They were delicious. They crisped well for being oven baked, not fried. I was very pleased with the filling. What with the fiber from the beans and limited oil/cooking spray, I felt like they were reasonably healthy too.
The recipe made about double what we could eat, so I just froze half. A few weeks later I popped them in a 350* oven until crisp, flipped, then crisped the other side. They reheated better than the frozen egg rolls I've bought at the grocery store. We dipped them in my favorite guacamole recipe. Definitely preferred that over salsa! The husband agreed.
Oh, and remember how I said I'm a terrible photographer? Yeah, sorry for the picture.
Note: I don't think I'm consistent on my filling portions because I ended up with extra. I just saved the rest and used it as enchilada filling. Tasted great!
Tuesday, July 3, 2012
In-Style In Boxes: 3/5

I'm sure most people would be able to make an organizer that looks better and less shoddy than mine. It works though and is still more fun (and cheap) than anything I would've bought. I have two of three more boxes saved so that I can give another one a try. Now I just need to convince myself to eat Lucky Charms, Golden Grahams, or Trix . . . Maybe the husband would like to do it for me.
Tuesday, June 26, 2012
Cleaning Sink with Bag of Vinegar: 1/5
Have you seen the pins about how to clean your sink? The aerator accumulates mineral deposits over time and this can be particularly difficult to clean. I have seen several pins that say you can tie/rubberband/whatever a bag of vinegar around the faucet and let it soak. This was a horrible, painful failure. I'm not referencing anyone's specific pin because, well, it is nobody's fault but my own. Oh, and the faucet's. And perhaps our hard water. See the offending faucet? It's in the trash.

Not only did I not get the faucet clean, but I broke the entire faucet. Then I tried to install the new one and failed at that too. After hours of wasting my own unskilled labor as well as several of the husband's, we ended up calling a plumber in the end. So that's the short version. If you care to hear the whole story, keep reading.
When I tried to tie the bag of vinegar to the faucet, it just plain didn't work. I couldn't get it sealed, so the vinegar kept leaking out of the bag and running down the underside of the faucet. After several attempts I gave up. I also realized I could hear a dripping sound under the sink. Somehow, and nobody knows how the some is, the vinegar was getting from the sink into the cabinet below. Of course I was frustrated and knew I'd have to chase that problem down, but first I was determined to get that aerator clean!
I figured I could unscrew the aerator with my hand. Nope. So I grabbed some pliers. Nope. The crust had gotten so thick that the aerator was stuck tight. Then I remembered my brother gave us a vice grip. Awesome! A chance to use it, right? Yeah. Rather than working through the green and white mineral deposits, I ripped the faucet in two. Seriously. I'm not that strong. I don't know how it happened. I would guess that it was cracking already which is how the vinegar was getting through. It's too bad nobody got to see the look of horror on my face when I realized what I had done.
Off to Home Depot I went to pick out a new faucet. I talked to friends, watched online videos, and read how-to articles. With a little more help from the vice grip (apparently I didn't learn my lesson after the first incident), I finally got it installed! And it was leaking. The husband and I tried and tried to fix the leaks. My mother-in-law gave me some great tips but sadly I still had one last leak we couldn't figure out. We just had to call a plumber.
 What was the problem? (By the way, if you're still reading this boring story, I'm impressed. Don't you have something more interesting to do?) The problem was one lousy nut. I put it on upside-down. I didn't know you could even get it to go on upside-down, so I would never have solved this on my own. The water was then creeping up the threads. Doh. The plumber was very kind and told me not to be embarrassed. But of course I was mortified. On the bright side, the new faucet is squeaky clean!
Tuesday, June 19, 2012
Gift Wrap Door (er....shelves) 4/5
Wrapping paper is a regular frustration for me. I've wanted to get a hanging door organizer for awhile (my mother-in-law has one that I love!) but haven't found one that fits my needs. The rolls of wrapping paper have just been crammed in the closet where they aren't easily accessible and often unroll. Then a friend on Pinterest posted a gift wrap door.
My closet doesn't have a swinging door but has sliding doors instead. However, I do have a metal shelving unit in the closet, and it was perfect for hanging the gift wrap.

I found some cheap shower curtain hooks from Amazon.com and clipped the rolls onto the side of the shelves. Done. Couldn't have been easier.
Monday, June 11, 2012
Insulated Casserole Carrier: 4/5
My mother-in-law has these great casserole carriers that look like this. I think she told me that she got them with the original casserole dishes when she was first married. Not helpful to me. Thus, I was thrilled to find this tutorial. I did make it closer to 40" to fit my handled casserole dishes, but otherwise followed the tutorial of Little Hooligans. The materials were definitely not anything I had lying around the house, but a quick trip to the fabric store fixed that. I got a little lost about how to make the velcro work, so I just did my own thing. It worked fine. Basically, I didn't measure where to sew the velcro and just slapped them on where I thought seemed best. Oh, and I didn't make the handle padding attachment; Angela was getting restless. Had I more time (and patience) I would have made them. Overall, good tutorial. Now I just need an excuse to use the carrier!


Monday, June 4, 2012
"That's the Best Frosting I Ever Had": 5/5
This recipe sounded weirder than weird. Who puts flour in a frosting?? From now on, I do. Scientifically, I have no idea how this recipe came together, but somehow the end result really is like the best whipped cream ever. I don't even like whipped cream very much. But this has such a buttery, rich flavor like buttercream frosting and has that light quality of whipped cream frosting
Of course it was a little extra trouble to have to cook the frosting, but it was well worth the effort. I put it on red velvet cupcakes from a box, and I couldn't have been happier. I've been told that this was the original frosting on red velvet cake before it become popular to use cream cheese frosting. Oh, and please be sure to let the frosting get cool, not just lukewarm. Otherwise you may have to throw it in the fridge and try mixing it again 30 minutes later. Or so I have heard.


One last thing! The recipe said the frosting was best served the same day as made. That is true. However, I have been enjoying these for a few days, and they still taste pretty good anyway.
Tuesday, May 29, 2012
Battery Storage in a Tackle Box: 4/5
Excellent idea. I don't know how you store your batteries, but ours were floating around the infamous junk drawer. Finding them was a pain. Truth be told, we usually bought new batteries instead of trying to find what we needed. Now they are nicely contained in one place. These are the simple things that take five minutes to do, but you can feel like you really accomplished something important!

See what a mess the drawer is? But the batteries are organized. By the way, if you want to rob my house and steal my checks, don't bother trying. Those may be check boxes but they don't have my actual checks in them. Sorry.

See what a mess the drawer is? But the batteries are organized. By the way, if you want to rob my house and steal my checks, don't bother trying. Those may be check boxes but they don't have my actual checks in them. Sorry.
Monday, May 21, 2012
Peanut Butter and Oat Energy Bites: 5/5

These little balls, on the other hand, are incredible. I just made another double batch after gobbling down the first batch last week. I did make a couple of changes, more out of a desire to avoid making an extra trip to the store than wanting to change the recipe. I used crunchy peanut butter instead of smooth. I'm certain the smooth would have been just as delicious, but I certainly didn't mind the crunch. The other ingredient my pantry lacked was the sunflower seeds. I just used some finely chopped walnuts. I loved the walnuts but, again, think the sunflower seeds would be good too. Maybe even better! Aside from being most delicious and super fast/easy to whip up, I also felt like I was eating something reasonably healthy. AND I really did feel satiated with just one. Unlike the cupcake I just finished and wanted to immediately eat another. But that's a post for another day.
Raw Cookie Dough Bites: 2/5
It sounds like a good idea, right? Healthy alternative to real cookie dough. I really should've known. If it sounds too good to be true, of course it is too good to be true. It's not that these were awful, but they did not taste like cookie dough. They tasted like nuts, oats, and honey in ball form. Except for the ball part. They were too crumbly for me to make balls. Instead I made a giant log. That's my laziness. I should've just added more honey, but by then I was too disenchanted. If you'd like a healthy snack, go for these with the extra honey! They did taste good. But if you think you're going to get cookie dough without butter or real sugar, you're as naive as I was.

Photograph courtesy of adashofcompassion.com
Saturday, May 12, 2012
Buttermilk Pancake Mix: 4/5
For Christmas this year I bought my mom a bottle of maple syrup. To go with it, I wanted to give her some homemade pancake mix. Because this was intended to make her breakfast delicious and simple, I didn't want her to have to add too many extra ingredients. This is what I found. The mix was super easy to make (no surprise there) and called for ingredients I had in my pantry. I ended up with enough mix left over to make myself a few pancakes and was quite pleased! The pancakes were super fluffy and all I had to add was water, an egg, and oil. I will definitely make these again for both myself and gift-giving.


Photograph courtesy of Mennonite Girls Can Cook
Easy Double Flannel Blanket: 3/5
I wanted to make a flannel blanket for my little Angela Rose out of this beautiful rose print I found. I went in search of a good tutorial. Because I had just finished my sewing class and felt way overly confident, I decided to make the self-bound version. Ha. Making a self-bound blanket was not-so-easy. Mitering the corners turned out to be tricky, and I had to reread the tutorial multiple times. I still never quite understood the instructions but somehow got mine to work well enough. For my first blanket I was pleased. Angela seems to like it just fine. I would not, however, have felt proud enough to give the blanket to somebody outside of the family. If I make another, I will either find a different self-bound tutorial or else just stick to the more basic version.

Whole Wheat Blackberry Ricotta Scones: 4/5
Technically I pinned a recipe for whole wheat raspberry scones. But I had blackberries. So. Blackberry scones it was. I actually LOVED these. They were flavorful, creamy, and moist. By far the best scones I've ever eaten! You could definitely taste the wheat though. It gave them an ever so slight bitter note, and it was not a hit with the husband. Too bad. They were reasonably simple to make, but not simple enough that I'd make them just for myself to eat. Not very often anyway.
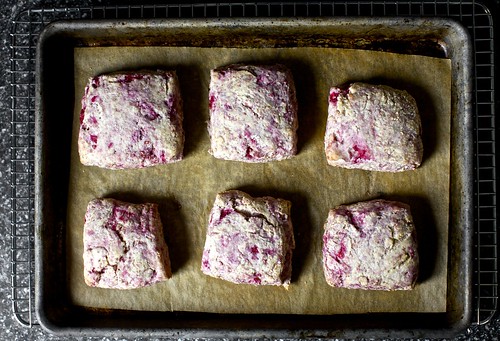
Photograph courtesy of Smitten Kitchen
How This Blog Will Work
When I first signed up for Pinterest I gave myself some guidelines. Otherwise, I knew it would quickly consume my life. For example, I don't follow everyone. I also don't follow every interest of those I do follow. I mean, if I don't macrome then why would I want to look at macrome projects? Which brings me to another point. I only pin things I actually intend to do or use. This may look impressive, but I know I will not be attempting it. Ever. Of course I have a long back log of all the projects/tasks/new meals I intend to accomplish. I'm only human. But I intend to keep working on that list. Sometimes it goes swimmingly. But other times it is epic failure.
So here's the deal:
So here's the deal:
- I will try to post as many pictures of my "finished products" as I can. I'm not a professional photographer. I'm not an amateur photographer. In fact, I'm a lousy one. Until photography becomes one of my pinning interests, you'll have to bear with me. Please accept my apologies in advance. If the finished product basically looks like the pin, I may skip the photo altogether.
- Each project will be rated on how well it worked as follows:
1/5: Project tanked; my life was made harder by it.
2/5: Project was unsuccessful but not necessarily a disaster.
3/5: Project had mediocre success.
4/5: Project success; I was pleased with the results.
5/5: Score! This project was life changing.
- I will be candid about what in the process went well and what didn't. If I would do something differently next time, I'll mention that too.
- Please keep in mind that my criticisms are not necessarily directed at the original creator. Most of the time, the problem lies in my execution (or the executioner, ahem).
- Lastly, I welcome any and all feedback (as long as you don't use profanity!). Please give us your own results, recommendations, tips or general comments.
Subscribe to:
Comments (Atom)